 Growing fruit, vegetables, and herbs in different containers is an excellent way to utilize limited outdoor gardening space or to enjoy the appearance of plants grown in pots, raised boxes, and even refurbished items such as tires, furniture, and wheelbarrows.
Containers not only save water, add beauty to any outdoor space, and fit in tiny areas; they are also mobile, simple to maintain, and almost weed-free, saving you time and water while you plant.
There is no surprise that fans of container gardening are widespread and diverse, ranging from experienced gardeners who want to downsize their planting space to novices with small balconies or patios.
In order to overcome issues like poor soil drainage, insect pests, and weeds when growing vegetables in the ground, Jessica Walliser, author of “Container Gardening Complete,” grows vegetables in containers at her home near Pittsburgh.
“I also grow in containers because it gives me the chance to grow beautiful tropical plants that I can easily move into the garage for winter,” she says. She adores Brugmansia, Abyssinian red bananas, and a black rubber tree plant.
Small fruit and vegetable plants are becoming increasingly popular, and planters are available in a variety of sizes and shapes, including raised beds.
Here’s how to begin your container garden.
Step 1: Decide on the proper location and the best time to plant.
When deciding on the best location for your container garden, keep the following things in mind:
- Adequate sunlight
- Easy access to a source of water
- Safeguarded from home pets
To grow and produce fruit, summer flowers and vegetables require 6 to 8 hours of sun (3 to 6 hours of sun for other plants like greens and culinary herbs).
See how sunny your gardening site is in the morning, early afternoon, and late afternoon, and place containers where they will receive the most sun they need to thrive.
Gardeners in some parts of the country can plant nearly year round; in other areas, planting is limited to the number of days between the last frost in spring and the first frost of fall. Ask your county Cooperative Extension Office for the optimum planting time for your location.
Step 2: Select what you want to plant in your container garden
Select the flowers and vegetables you prefer, whether annual or perennial. You may also create an ornamental and edible container garden by combining them.
Jessica starts off the year by planting kale, lettuce, and peas in an elevated cedar patio planter to get an early start and to prevent seeds from rotting in cold, clay-based soil.
Grow the highest-priced vegetables you usually purchase at the store or farmer’s market, such as herbs and heritage tomatoes. You should also plant the kinds of vegetables you purchase in large quantities, including lettuce, spinach, green onion, beans, cucumbers, eggplants, summer squash, and peppers.
Select variety that is especially bred to thrive in containers when buying seeds and plants. ‘Bush-type, baby, little, early, snacking, and cut and come again’ lettuces and other greens are included in the plant descriptions.
Step 3: Choosing the right container is important
Your imagination is the only limit when it comes to container choices, whether you choose terra cotta pots, glazed ceramic containers, plastic pots, fabric baskets, raised planting beds, self-watering containers, hanging baskets, or other containers. Repurposed items can also serve as great containers. Consider bushel baskets, whiskey barrels, metal wash tubs, and watering cans, for example.
Three Tips for Picking Containers
- The mature size of the plant(s) should be matched to the container using the plant height and width printed on the seed packet or plant label. A 2- to 5-gallon container with a 12-inch opening is regarded as the minimum size.
- Plant roots must stay healthy when roots are contained in containers. Poke or drill holes as needed.
- Use food-safe containers to grow vegetables and other edibles. You can obtain free or inexpensive food-grade plastic buckets from delis, bakeries, and restaurants.
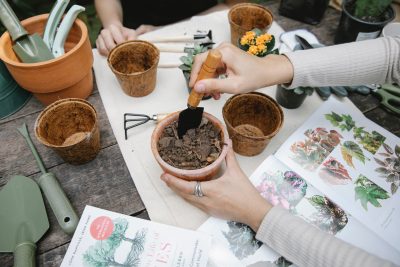
Step 4: Planting in containers is described as follows
- Place the saucer under the container to collect water.
- Keep the soil in the container by covering the drainage holes with coffee filters. Potting soil should be poured into the container to within two inches of the rim.
- Slow-release plant fertilizers should be mixed in the recommended amount.
- Use the planting trowel to dig a planting hole or holes in the container. If you’re planting seeds, follow the instructions on the seed packet.
- Plant your shrub or plants in the holes at the same level as they were in their pot.
- Soil should be firm but gently pressed.
- Soak the soil around the seed ball with water to ensure the seeds germinate. Use a fine spray to moisture the soil; keep it moist until the seedlings emerge.
- Wait for seeds to sprout before mulching the tops of pots, or sprinkle a thin layer of mulch around the plants.
Step 5: Take good care of your container garden
A container garden takes a lot of tender loving care to succeed. When the soil’s top inch or so is dry, add water (use your finger as a gauge). Water deeply, until it runs out the bottom of the container and until the soil is well saturated.
Fertilize your garden every two weeks with dry or liquid soluble plant food to maintain healthy plants and maximize yields. After planting, use a trellis to support tall plants like tomatoes and beans.
Immediately deal with any problems you notice. Remove dead flowers (deadheading) and pull any weeds that grow, in addition to keeping an eye out for insect pests.
Step 6: Harvest time
It is best to harvest fruits, vegetables, and herbs as soon as they are ready. Do not delay; the earlier the better. Regular harvesting keeps the plants producing rather than producing seeds.
Small herbs and greens can be harvested at any time; they’ll still be tasty. Eggplants must be harvested while the skin is shiny, even if the fruits are small. Peppers may be harvested when they are the proper size for eating. For the most flavor, tomatoes should be red-ripe before they are plucked from the vine.
Step 7: Contain gardens require care during the off season
In areas with frigid winters, clay or glazed ceramic containers should be put in a garage or shed to prevent them from shattering. If your winter weather is mild, you may leave containers outside all year.
Certain perennial plants, such as chives and scallions, will go dormant and begin growing again in the spring, despite the cold temperatures. Annual plants, on the other hand, will fade. The early greens signal the beginning of a new season of container gardening.
More reading: Gardening Advice for Beginners
Now is a great time to sell! If you or someone you know is considering selling your home or land, we would be happy to offer a complimentary consultation. Call New Earth AVL Realty today or Contact Us.
How can I connect you to be of service? Call New Earth AVL Realty to learn more today.
If buying a home, or selling your house in 2022 is your goal, call me today.
Many blessings,
Jason Martini
828-515-1771
PS. Who do you know that I can serve?… Who is choosing to buy, sell, or invest in real estate in AVL or Beyond? I Am grateful for your referrals! Your friends and family will thank you for connecting us!
PSS. Please feel free to comment below and let us know how you liked this blog post and what it brought up in you. And by all means… share it on your social sites too!